Applying AI in Android: From On-Device ML to Cloud Models
This article was originally written for the Yandex Practicum Middle Android Developer course (free track). You can find the full course and the original article in Russian there. This English translation was done — ironically — using AI, specifically Claude.
Everyone is talking about artificial intelligence these days. It’s probably only a matter of time before your manager asks you to integrate a “super AI feature” into the app you’re working on — and it’ll be great if you, as a developer, are prepared for that in advance. In this article, we’ll talk about artificial intelligence and machine learning and look at what AI capabilities are available in Android applications.
What Are Artificial Intelligence and Machine Learning?
AI expert Luis Serrano, in his book Grokking Machine Learning, defines artificial intelligence as: “Artificial intelligence is the set of all tasks in which a computer can make decisions.”
What is the object in the photo — a cat or a fish? How should the phrase “Sorry, I won’t be coming to work today because…” be completed for the user? Which track should play next on a personalized radio? The answers to all these questions are results of artificial intelligence — the computer can solve such tasks on its own.
Machine learning is often confused with artificial intelligence, but it’s actually just a subset of AI. Serrano clarifies that “machine learning is the set of all tasks in which a computer can make decisions based on data.”
By analyzing large amounts of data, the computer identifies patterns and uses them to fulfill user requests. Machine learning is considered a field within artificial intelligence.
Consider, for example, a chess game. You can program a computer to make moves based on certain rules: protect the king, capture opponent pieces based on their value, and so on. If you write such logic using if-else conditions, the program can already loosely be called artificial intelligence — at least some people think so.
Alternatively, you can analyze millions of games played, identify patterns, and predict which move would be more advantageous. This is a classic example of machine learning: the decision about the next move is made based on a model that was trained on an enormous amount of data.
The Model, or How Your Phone Plays Chess
So what is a model? Let’s continue the chess analogy. By taking the history of many chess games, we can arrive at several conclusions. (The author plays chess at an amateur level, so please forgive any inaccuracies — all numbers and situations are fictional.)
- If castling was performed, 8 out of 10 such games ended in victory.
- If one side lost its queen, it lost the game 9 out of 10 times.
- …
The collection of all conclusions, rules, and data that help make decisions is called a model. And identifying these patterns from data is called training the model.
The more data a program has, the more patterns and regularities it can identify — across any type of information: text, visual, or audio.
Modern models are measured in gigabytes (on Hugging Face you can explore publicly available models). At that size, using them on a mobile device is hardly practical — only the most dedicated user would download that much data just so a “recommendation AI” could suggest the next show to watch. But fortunately, there are models in special formats with small sizes that can and should be used for mobile applications.
When it comes to applying ML on mobile, there are generally two approaches:
- Cloud-based, where a “large” model sits on a server and the client sends text, an image, or video and receives a ready result.
- On-device, using a “small” model in a special format on the mobile device — making decisions right on the device itself.
Advantages of the cloud approach:
- You can use powerful models.
- Models are easy to update. No need to ask users to update the app to get a better-trained model.
- The app can be used on weak devices.
Advantages of the on-device approach:
- The model can work offline.
- Low latency — no need to wait for a server response.
- Privacy — no need to send user data anywhere. This drastically reduces questions about the service, e.g. during app store review.
- You can save on compute costs — the user’s phone resources are used, not the server’s.
The choice of approach depends on the task. For example, to recognize a printed document, it’s sufficient to have a model on the phone trained to distinguish letters. This is also convenient because the user doesn’t need to worry about privacy since the app doesn’t require internet and works offline. On the other hand, if you need to build an app that identifies bird species by their song, the cloud approach is better: there are a huge number of birds and a more powerful model will better distinguish sounds that are likely recorded with noise.
In the general case, a hybrid approach is used: a small model on the user’s device for fast offline work, plus a model on the server when complex logic or higher-quality answers are needed.
Do You See a Gopher?
Let’s look at the implementation of one of the most common tasks that modern models handle well — image object recognition. We’ll break the work into stages:
- First, we’ll try to simply identify what’s in a photo. An on-device model is suitable for this — despite the huge number of objects that could be depicted, most can be reduced to broad categories. Using the ML Kit library from Google, we can identify over 400 objects without significantly increasing app size: the library with the model file adds roughly 6 MB. In return, we get fast response times and offline capability.
- Using Firebase AI, we’ll go beyond simply recognizing what’s in an image. We’ll use the image as a prompt, calling a remote large language model hosted on Google’s servers. We’ll add a text prompt too, asking it to describe the image contents more clearly. This way, a person with visual impairments could photograph their surroundings and get a spoken description.
Prompt — an instruction (request) for AI: what exactly to do, in what format, and under what conditions.
Setting Up the Project
Go to the repository page at https://github.com/mfperminov/MLKit-demo and clone the project. Open it in Android Studio, select Terminal at the bottom left, and enter:
git checkout step-1-labeling
This switches to the first commit. After syncing and importing, take a closer look at the code.
To use an on-device model, the phone must support Google services (most devices on the market do). If your device doesn’t support them, no worries — you can always create an emulator, and even camera functionality will work!
Working with the Camera
Since we’re working with photos and need to take them inside the app, we need the CameraX library. With it, we display a preview view and obtain the user’s snapshot using the ImageProxy class from the androidx.camera.core package. This class represents a memory buffer slot under the hood that stores the snapshot for fast processing — an ideal solution for our case. Using the helper function imageProxyToBitmap (see the CameraScreen file), we assemble a bitmap to pass to the model (com.example.mlkitdemo.analyzer.ImageAnalyzer#analyze).
Don’t forget that camera access requires a separate system permission. In the manifest, add:
<uses-permission android:name="android.permission.CAMERA" />
At runtime, you need to request the permission (see the MainActivity file). In this example, we use Compose and the modern permission approach via ActivityContracts (docs). In Compose, there’s a convenient function for this:
val permissionLauncher = rememberLauncherForActivityResult(
    contract = ActivityResultContracts.RequestPermission()
) { ... }
On first launch, show a button that triggers the system permission dialog:
PermissionRequest(
    onRequestPermission = {
        permissionLauncher.launch(Manifest.permission.CAMERA)
    }
)
If the user grants permission, the main content with navigation is displayed.
Image Recognition with ML Kit
To use ML Kit, add the dependency to app/build.gradle.kts:
implementation("com.google.mlkit:image-labeling:17.0.9")
The recognition logic is encapsulated in the ImageAnalyzer class. Here we create an ImageLabeler instance:
private val labeler = ImageLabeling.getClient(
    ImageLabelerOptions.Builder()
        .setConfidenceThreshold(0.7f)
        .build()
)
In the options builder, you can configure the confidence threshold — the minimum certainty for an answer. Setting it to 0.7 means that if the model thinks a photo shows a cat with 69% probability, it won’t return “cat” as a result — such answers are simply discarded. For practical purposes, this threshold is sufficient.
Next, in the analyze method, we accept a Bitmap of the camera snapshot and construct an InputImage class that normalizes the image for better recognition (for example, it can resize it).
And then — the magic! We call ImageLabeler#process(InputImage), sending the image to the model. After a brief wait, we receive a list of labels — what the model “saw.” In the CameraScreen file, the recognition result is stored as a state variable and displayed in the ResultsCard Compose function — showing the object name and the probability of it being in the image.
Let’s look at running on an emulator. If you launch the same way, our results will be roughly the same.
After photographing the surroundings, the recognized objects card displays the model’s answer: “Room: 84%, Tile: 74%, Shelf: 74%.”
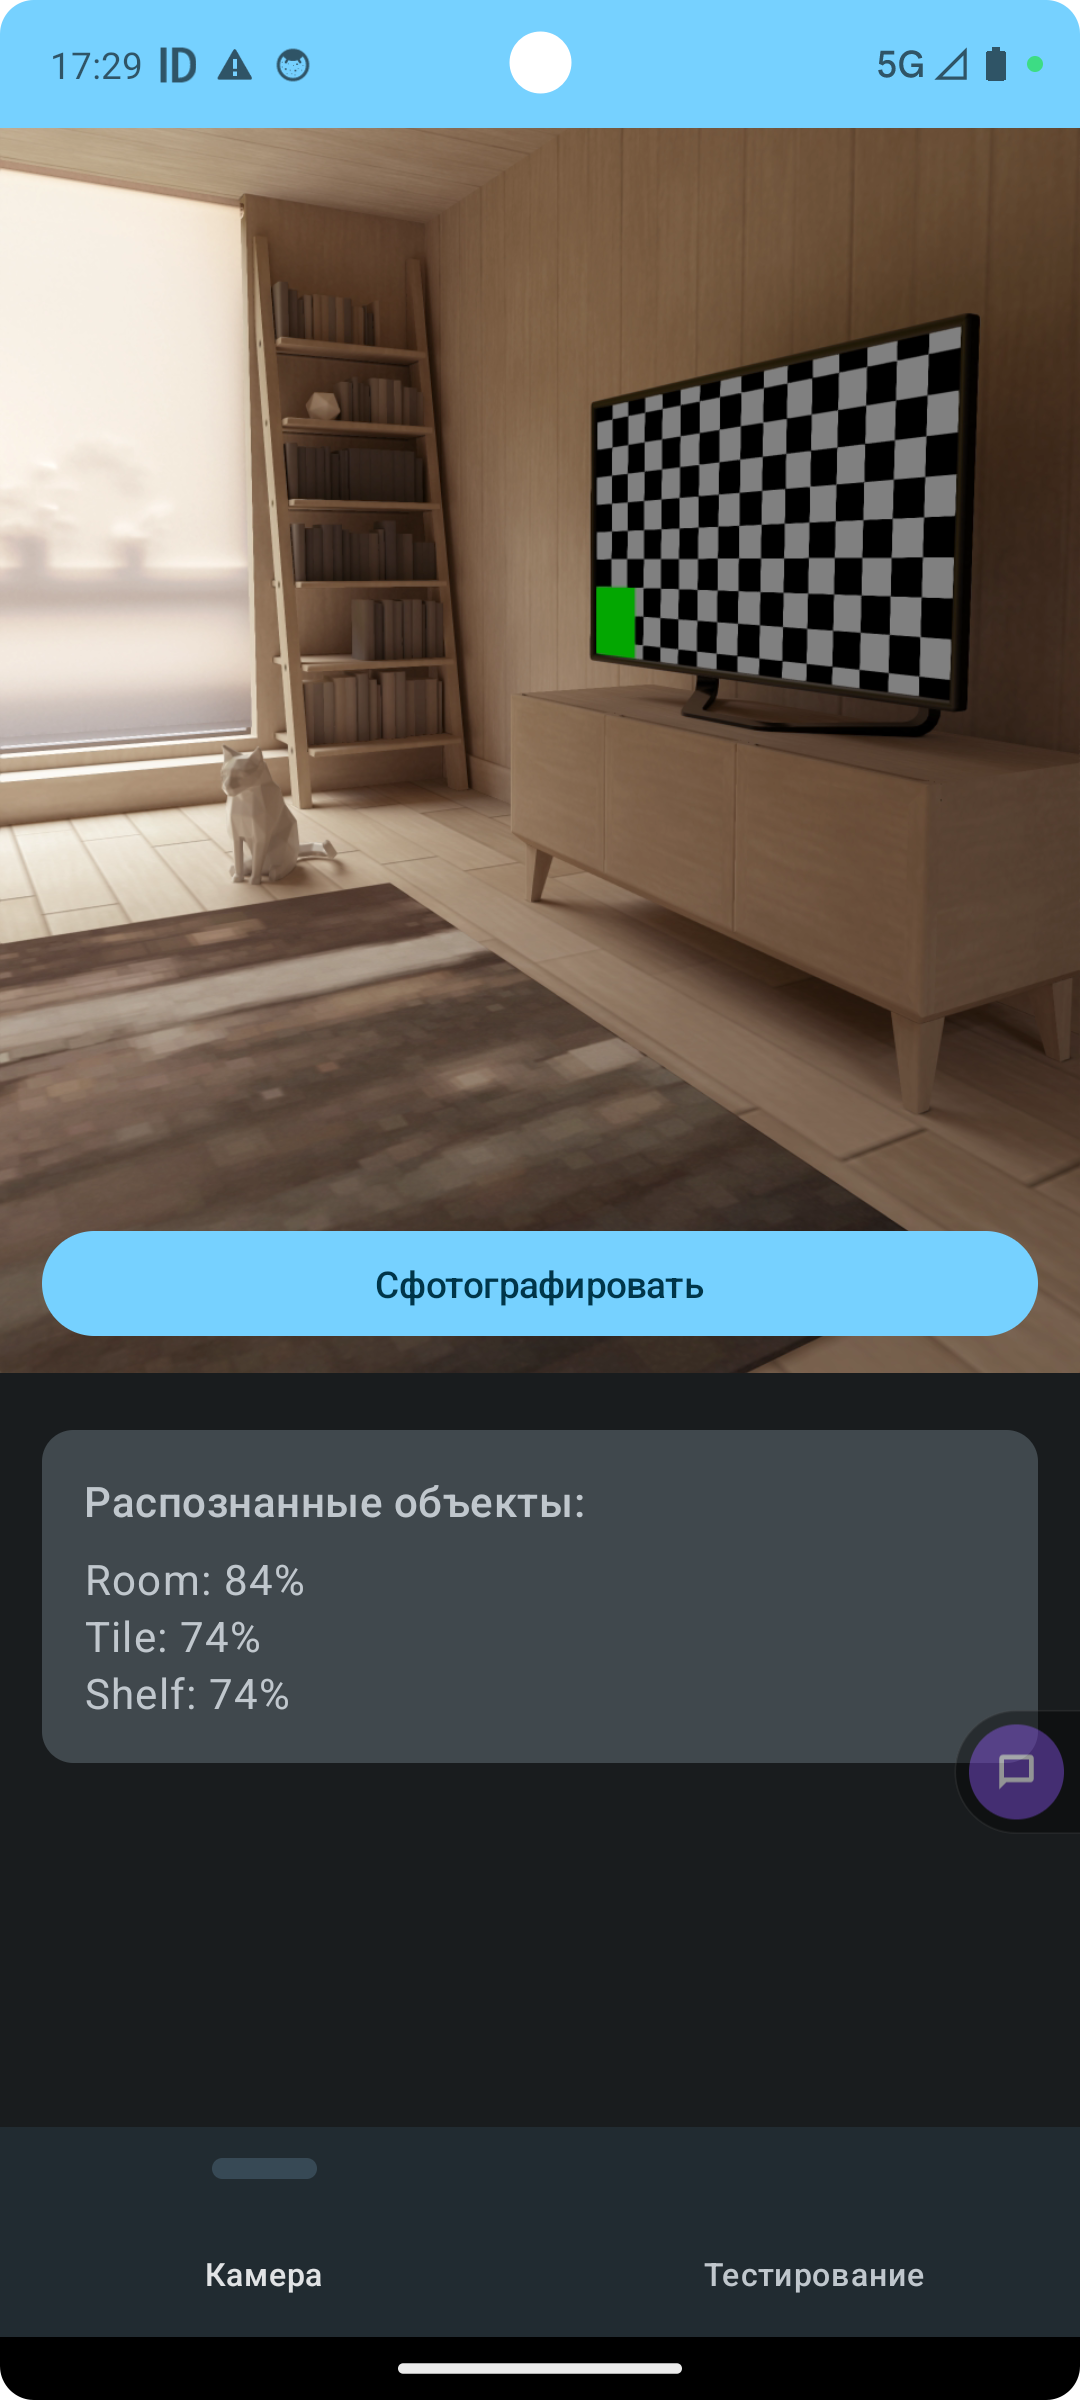
The model decided the photo shows a room, tiles, and shelves. Not bad at all for a small on-device model!
You can also verify that the model truly doesn’t use the internet and runs on the device itself — enable airplane mode and photograph something else (on the emulator, you can rotate the camera view by moving the mouse while holding Shift).
If you have camera issues (for example, android.hardware.camera2.CameraAccessException: CAMERA_ERROR (3): The camera device has encountered a serious error), switch to the “Testing” tab. There you’ll find a cute dog — the model will identify it with confidence close to 99%. This image was placed in the app’s resources from the start and is also read as a bitmap, so the same analyze method from ImageAnalyzer can be called.
Tell Me What You See in This Picture
Let’s move to the second part. In the terminal, enter:
git checkout step-2-genai
This teleports us to the final version of the application. The task: get a textual description of an image in natural language. For this, we’ll use one of Firebase’s tools — Firebase AI. As you can see from the class descriptions, this library can generate not only text but also images.
First, add the dependencies:
implementation(platform("com.google.firebase:firebase-bom:34.7.0"))
implementation("com.google.firebase:firebase-ai")
If you try to build the project now, you’ll get an error saying the google-services.json file is missing. Firebase requires registration and optionally charges for API usage, but the free tier is sufficient for learning projects.
Firebase Setup
- Go to https://console.firebase.google.com/
- Sign in or register a new account.
- After signing in, click Create a new Firebase project.
- Enter a project name (e.g., “ML Kit Demo”).
- Click the Android icon to indicate you have an Android app.
- In the Android package name field, enter
com.example.mlkitdemo. - Nickname and SHA can be left empty.
- After registering the app, download
google-services.jsonand place it in the project’sappfolder. Important: don’t add this file to git — others could use your keys if you publish the project. Add it to.gitignore.
Now the project should build. To access the remote AI model, you need to enable the API separately:
- Go to your project page (Project Overview).
- In the left column, select AI → AI Logic.
- On the page that opens, click Get Started.
- In the next window, select Gemini Developer API → Get Started with this API.
- Click Enable API. You can skip AI Analytics. After clicking Continue, an access key for the Gemini model will be created for your app. In a few minutes, you’ll be able to make your first request.
The Code
The image description logic is in the ImageDescriber class. Inside it, we create a reference to the remote model:
private val generativeModel = Firebase.ai(backend = GenerativeBackend.googleAI())
    .generativeModel("gemini-2.5-flash")
From the same screens, with a similar code structure, we call describe(bitmap: Bitmap), which performs a multimodal request to the model. This means the prompt includes both the image (which makes sense — it needs to be described) and a text part explaining how to describe the image contents for a person with visual impairments. You can also attach video or PDF files to the request.
Press the “Describe Photo” button and wait a moment. The output is a rather poetic description of the image: a cozy modern room bathed in warm light, with a striped rug, a beige sofa, a small cat figurine, bookshelves, and translucent curtains.
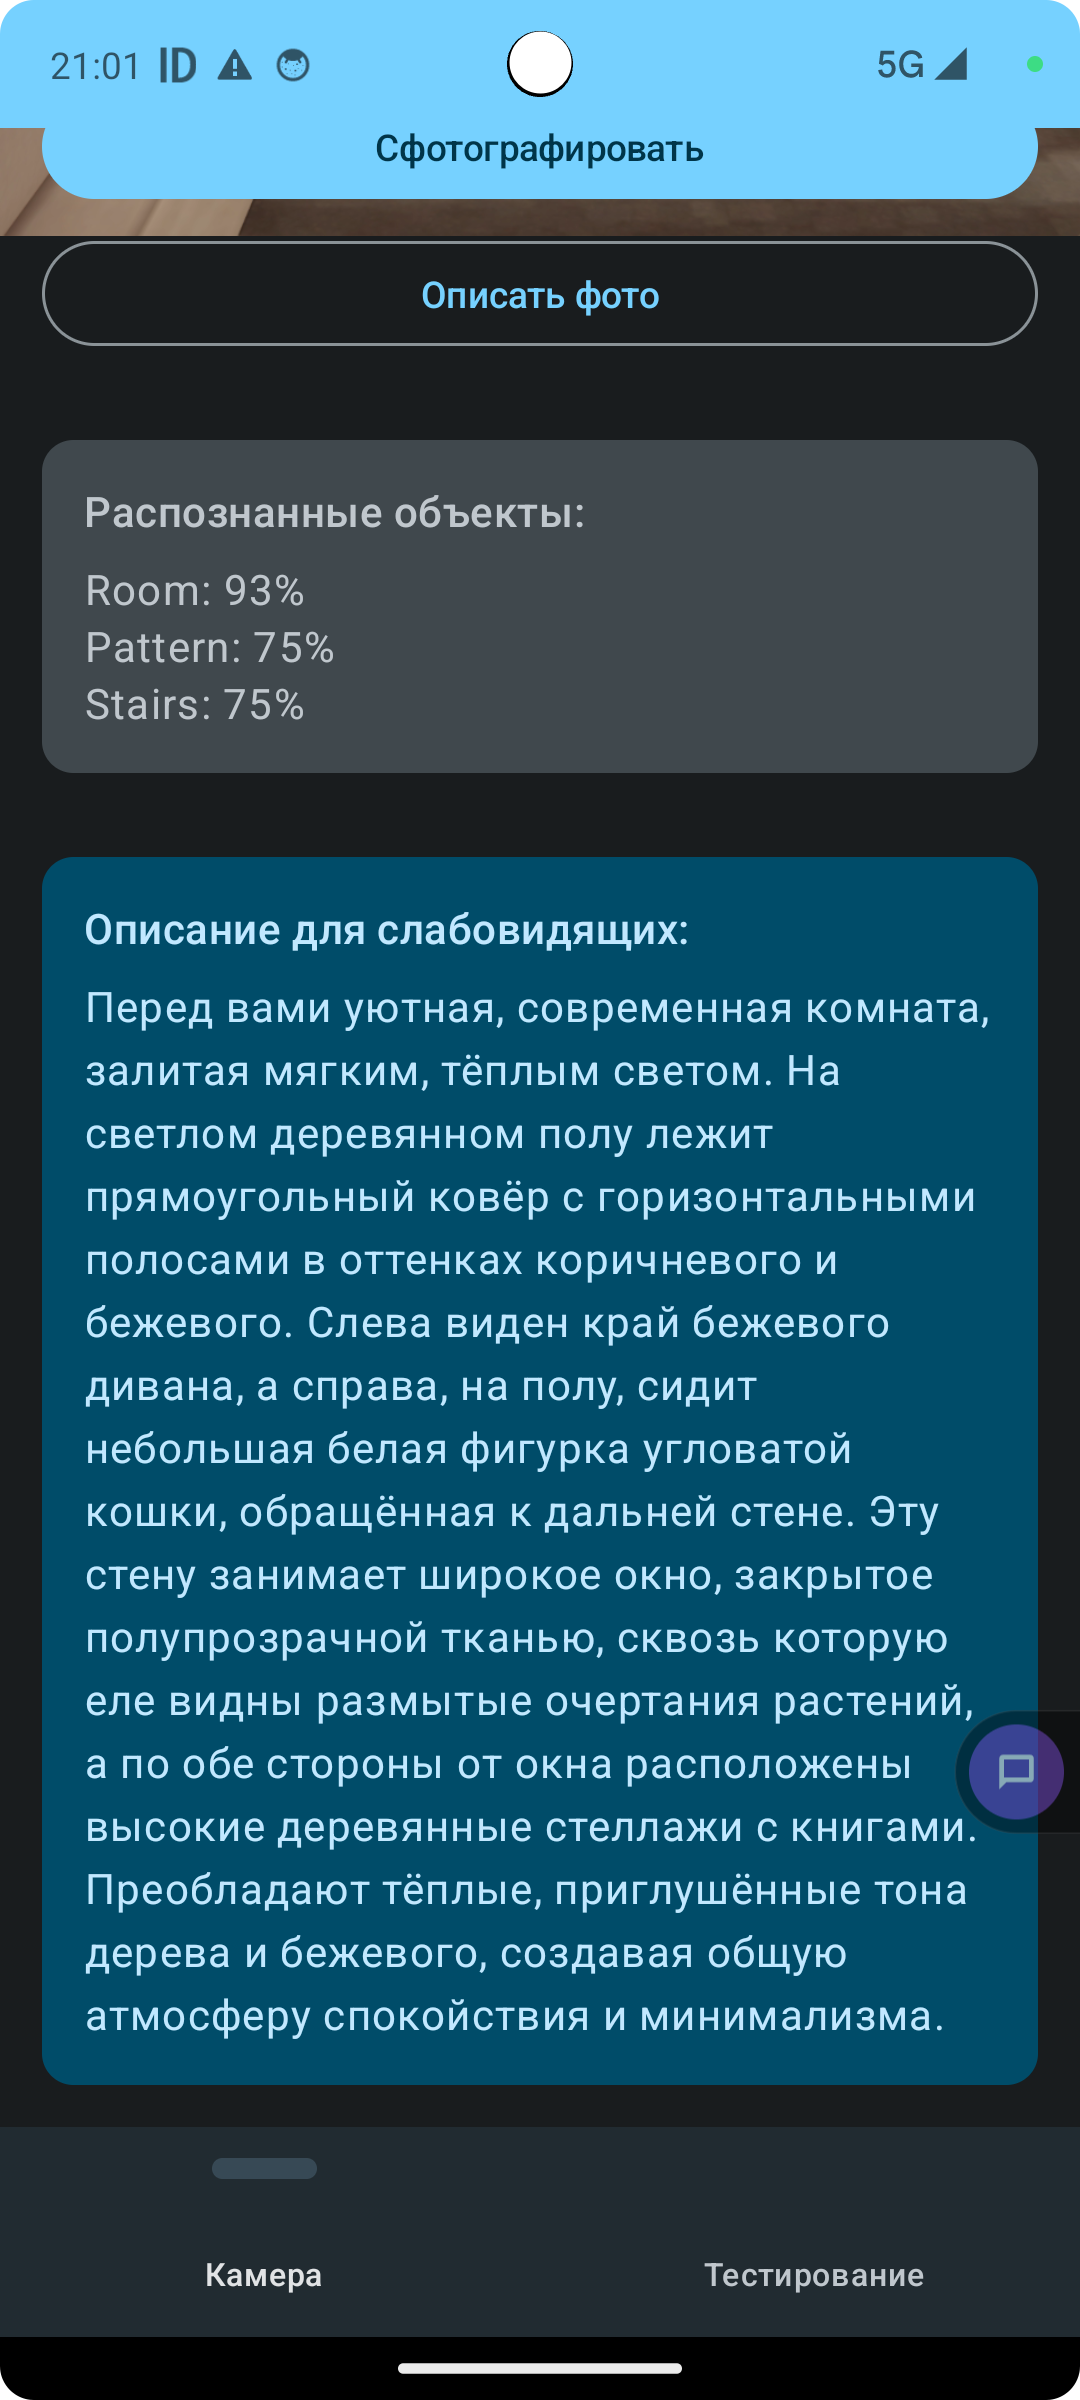
Now a visually impaired user can use TalkBack, a system accessibility program, to have this text read aloud and learn what’s in the picture. It’s genuinely rewarding when our apps and AI bring real value!
Summary
In this article we:
- Got acquainted with the concepts of artificial intelligence and machine learning.
- Learned what a model is and what training a model means.
- Explored two ways to work with machine learning models — on-device and remotely on a server.
- Practiced image recognition using the Google ML Kit library.
- Used Firebase AI to generate a detailed textual description of an image for people with visual impairments.